How to Draw a Baby Bear: Easy 10-Step Guide for Kids
This baby bear tutorial is perfect for young artists ages 5 and up. All you need is a pencil, an eraser, and some paper to bring this cuddly character to life. By following these simple shapes, you will develop confidence in your sketching skills while creating an adorable forest friend.
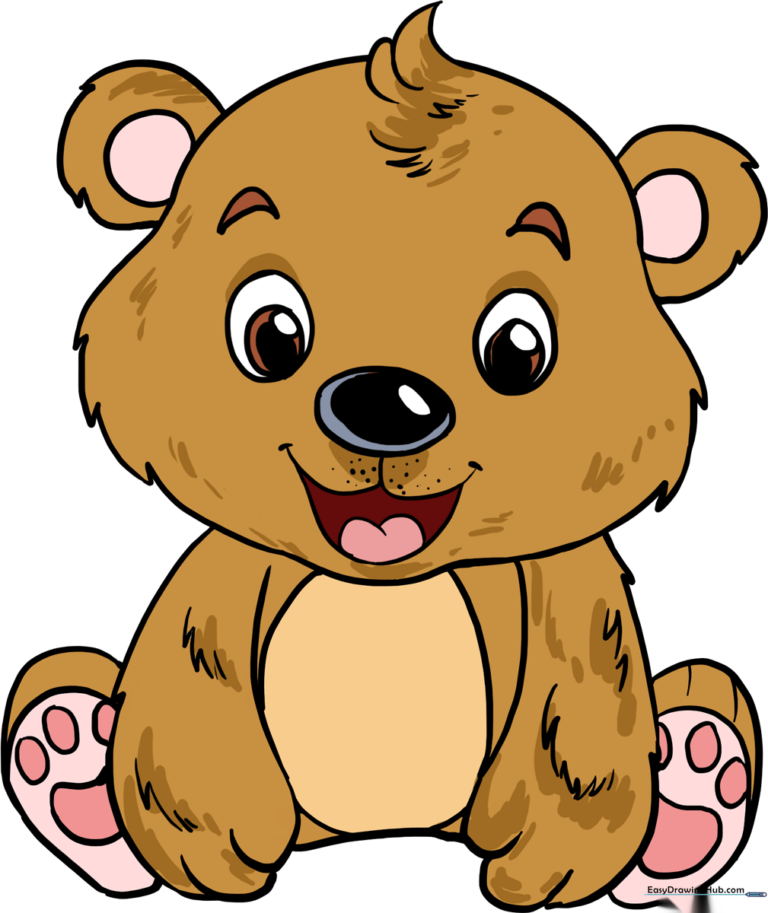
🎯 Final Result
Step-by-Step Instructions
Sketching the Head Shape

Draw a light oval to serve as the base of the bear's head. Teacher's Tip: Keep this oval about the size of a golf ball; drawing it lightly makes it much easier to clean up your sketch later.
Defining the Cheeks and Chin
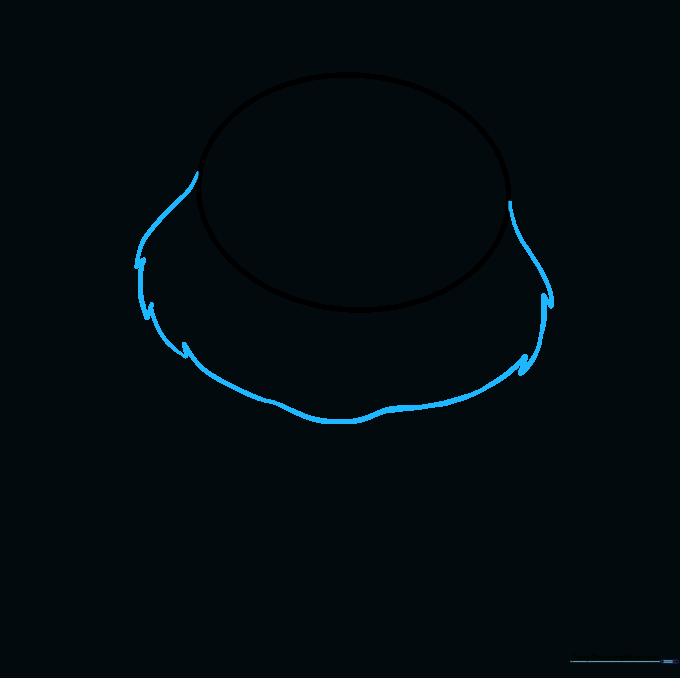
Use short, connected curved lines to sketch the cheeks and chin. Tip: Make these lines look a bit jagged to mimic the texture of soft, fluffy fur.
Adding the Ears
Draw two partial circles on the top sides of the head for the inner ears, then surround them with rounded, jagged lines for the outer ears. Tip: Keep the ears symmetrical to give your bear a balanced, cute look.
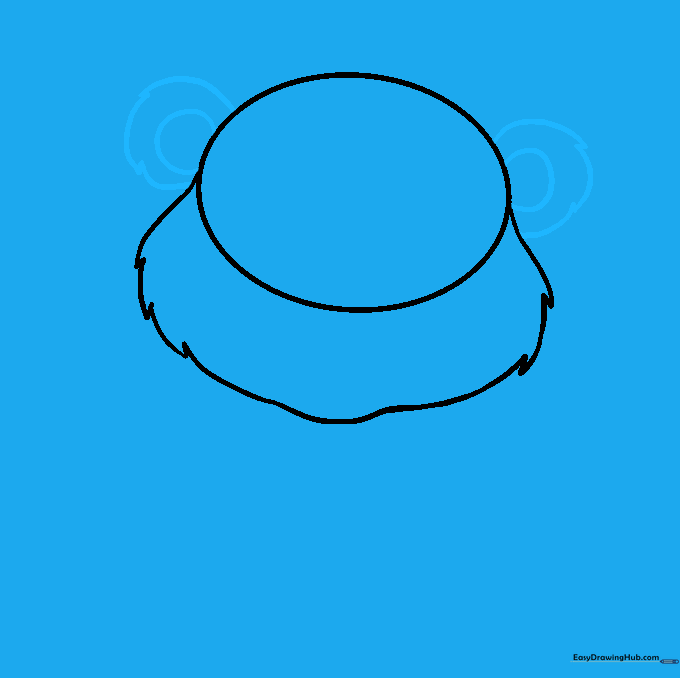
Cleaning the Face

Carefully erase the original oval guide lines inside the face area. Tip: Use a soft eraser and hold the paper down firmly so it doesn't crinkle.
Sketching the Arms and Paws
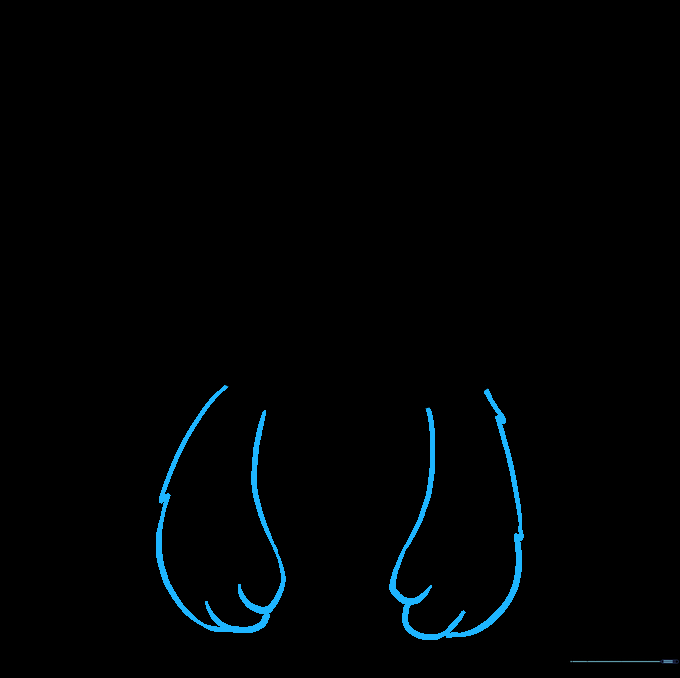
Extend two pairs of lines downward to form the arms, using 'U' shaped lines at the ends for the paws. Tip: Overlapping your 'U' shapes helps create the appearance of little fingers.
Drawing the Belly

Connect the arms with a curved line and add an oval for the belly. Tip: Keep this oval centered to ensure your bear looks balanced.
Adding the Feet

Sketch irregular ovals for the feet, adding smaller ovals on the bottom for pads. Tip: These don't have to be perfect circles; organic, slightly wobbly shapes look more natural for a baby animal.
Detailing the Face
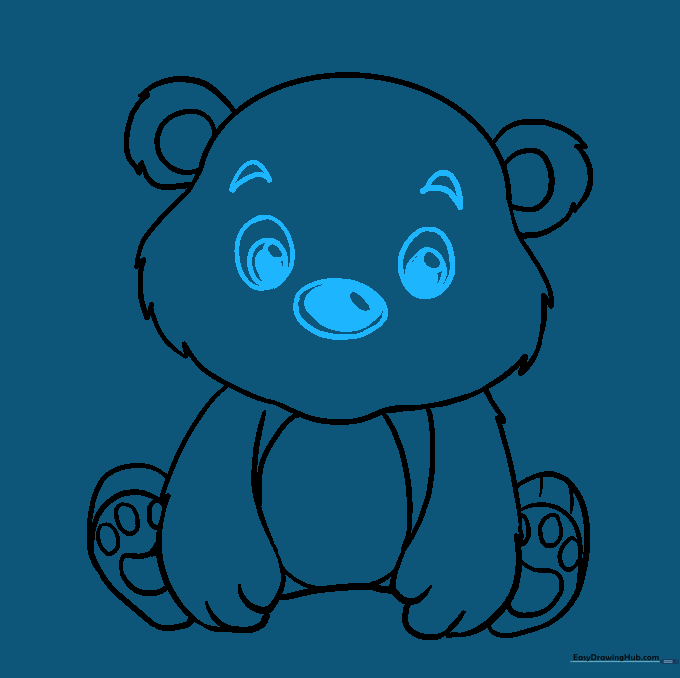
Draw the nose using three nested ovals and shade the center. For the eyes, use overlapping ovals to create depth. Tip: Leaving a tiny white spot in the pupil makes the eyes look bright and alive!
Final Touches and Fur
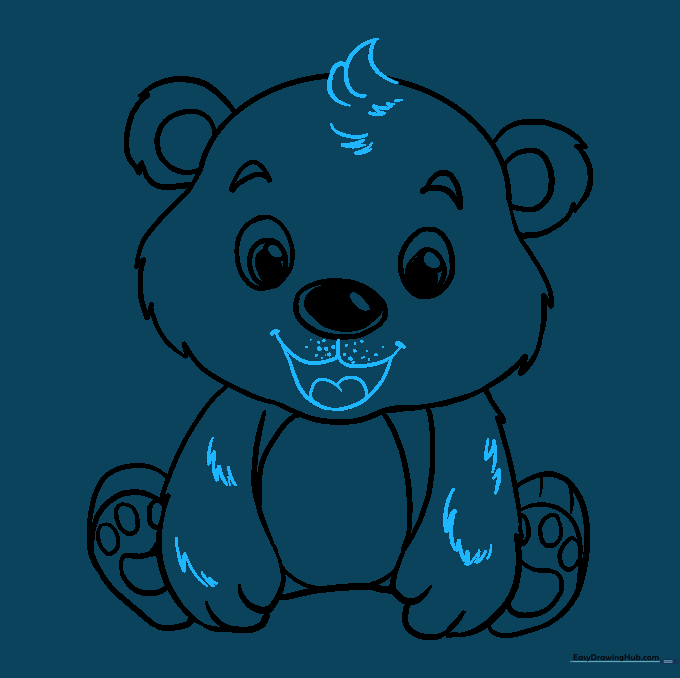
Add the mouth, tongue, and a tuft of hair on the head. Use short, quick strokes to add texture to the body. Tip: Erase any remaining construction lines to make your drawing look clean and professional.
Coloring Your Bear
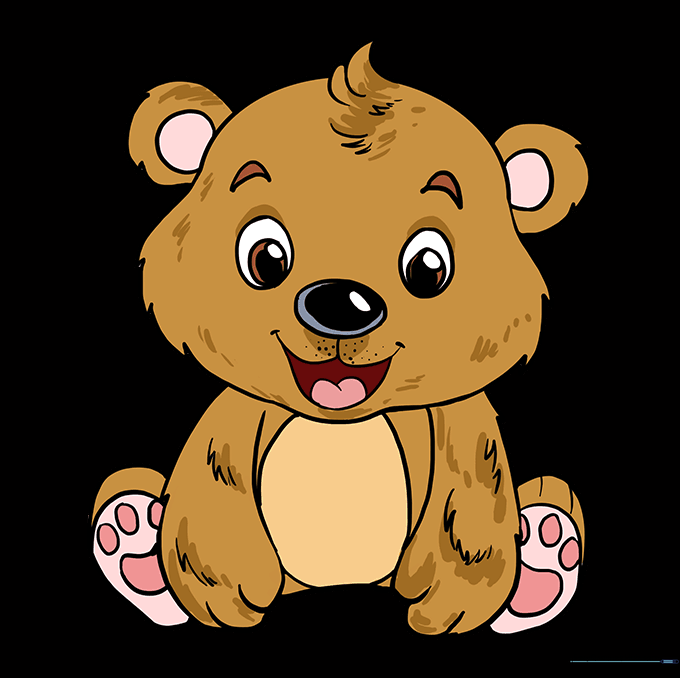
Bring your bear to life with color! You can use traditional brown, or get creative with blonde, white, or even black. Tip: Use light pressure with your colored pencils to layer colors for a more realistic fur effect.
More Tutorials


